Troubleshooting a Singer 9410: Tension and Bobbin Problems
The more things change the more they stay the same. As technological upgrades come to sewing machines, it seems that the same problems that plagued the original models still give the newer sewing machines a lot of trouble.
When it comes to tension issues, there may be a piece of lint or a small piece of thread stuck in the dials. To clear this problem up you may have to use a small piece of fabric to ‘floss’ between the dials and remove the lint, etc.
To learn more about troubleshooting a Singer 9410, just continue to read our article. It looks at different 9410 issues and provides the information you need to help you get your machine up and running smoothly again.
Singer 9410 Disassembly

Owner's manuals tend to leave the disassembly of the sewing machine out of its pages. The reason behind that omission is that manufacturers do not want owners to do their own repairs. They want the machine to be taken to their approved repairmen.
The first step in disassembling the 9410 is to find the screws holding the different plastic covers onto the machine. You have to be careful here as one cover may have to be the first one to be taken off and if you do not have the manual telling you which one that is, you will spend time looking for it.
After getting the screws off, look for screw hole plugs to make sure you have all the screws out, and then look for plastic catches that need to be pressed in order to release their hold. press those gently, and then should come off with a slight tug.
Singer 9410 Parts Diagram

Getting to know your sewing machine, means getting to know all the different parts that make it run. This objective can be done by viewing the pages of the owner’s manual. The different sewing machine companies do place a basic parts diagram in their manuals.
Those diagrams will not tell you how to disassemble the sewing machine but they will show you where those important parts are. To get a look at the diagram, simply click this link and then this one as well.
The companies do not want you to be fiddling with the motor and other internal parts and one reason for that is your work may void your warranty. Also, they know that some DIY handymen may make a mistake and cost you a lot more repair money.
The parts diagram will help you design a good checklist to handle those common sewing machine issues that arise from time to time.
Singer 9410 Tension Problem

The 9410 does come with an auto-tension mode that should monitor and regulate the tension when you change fabrics. Unfortunately, this mode of operation can give you problems from time to time.
The most common source is lint or a piece of thread stuck between the tension dials. Take a small thin piece of fabric and gently go between the dials and rub that lint or thread out.
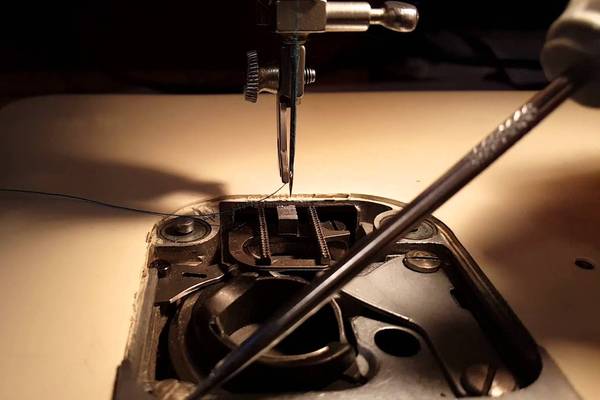
Then, there may be a small burr that has developed on the tip of the hook underneath the bobbin case. If there is one there that burr can damage your thread and ruin your tension. To get rid of the burr use a piece of emery cloth and sand it down until the tip is smooth again.
Also, check other metal parts where the thread goes near or across. A burr can develop in those areas as well and you need to smooth them out in order for the machine to work right.
9410 Bobbin Not Working

One reason your bobbin may not be working is not that the error is with the bobbin. It could be that there is not enough oil in the bobbin area to let it spin correctly.
There is a small hole to the right of the bobbin holder on the bobbin winder. Place a drop or two of sewing machine oil in that hole. Then release the inner wheel and run the machine for a minute or two.
If the problem is not solved with that solution, check your bobbin to see if it is the correct one for the machine. Or the rubber ring may be worn down and doesn't connect as well as it should.
To try and fix that connection, you need to unscrew the casing and push the rubber with your finger. You may have to take the machine to your repairman if this doesn’t solve your problem.
Singer 9410 Bobbin Case Installation

The first step is to unplug the machine and then find the bobbin case cover location (under the needle plate). Next, remove the cover and pull the bobbin case release lever away from the case.
The third step is to insert the bobbin case onto the spool inside that compartment. Fourth, release the bobbin release lever making sure that the lever goes snug against the bobbin case.
The lever should automatically lock into place if done correctly. The fifth step is to twist the case gently to make sure it is in the correct position. If it isn’t the case can fall off the spool during sewing.
If everything is in its right place, replace the cover and start to sew. The installation is not difficult, the key is to make sure you get everything in its proper place.
Some Final Words
Simple common problems are easily fixed and you do not have to take the cover off the 9410. These common issues are the same for every model of sewing machine. However, because technology has changed the design a bit, the 9410 may require a little more effort to solve those issues.
Look at the end of the sewing machine manual to get some pointers and if those pointers do not cover your issue, contact a repairman.

