How to Make a Dress Bigger in The Bust Easily (Helpful Tips)
If you’ve heard the term “letting out” and wondered what it means, you’re in the right place to find out. “Letting out” is, simply put, the term for making your dress a little roomier than it’d otherwise be. The term comes from how the process involves making the dress larger by ‘letting” the fabric “out” of the seam.
Can a dress be “Let Out”? The first step in checking whether a dress can be let out is to check the seam allowance. If a dress has more than a ¼ inch seam allowance, you’re in luck. With a few alterations, you’ll be able to “let” out the dress to a much more accommodating fit.
Dress Too Small At The Bust?

If your dress is too small at the bust, don’t despair. If you’ve got basic skills with a needle, there’s a good chance you’ll be able to rescue it.
First of all, check the existing seam allowance. If it’s more than ¼ inch, we’re good to move straight on to the next section to discover some of the methods involved in letting the bust out.
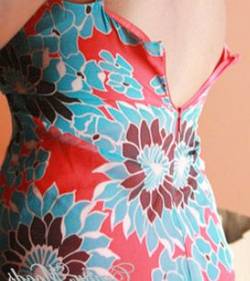
If the seam allowance is less than ¼ inch, you still stand a chance of saving the dress by adding a “fabric garter”. Typically, this method is used on wedding dresses (we’ll go onto this in a little more detail shortly), but it’s equally suitable on other dresses that have either a corseting detail or a back zip.
How To Expand The Bust Of A Dress

As any woman knows, finding a dress that fits perfectly can seem like a never-ending task. Whatever designers are doing with their time, making dresses to fit real women’s bodies doesn’t seem to be part of it. Fortunately, it’s easier than you think to make a few little adjustments and turn that ill-fitting frock into your most comfortable dress yet.
If the bust of your dress is nipping, grab your supplies and “let it go” with this easy step-by-step guide.
What You’ll Need
- Basic Sewing Supplies
- Bullet Point 2
- Scissors
- Seam Ripper
- Tailor’s Chalk
- Measuring Tape
- Optional: Sewing Machine
The Method
Step 1
Flip the dress inside out and find the seam (i.e. where the two edges of fabric have been sewn together). Measure the amount of seam allowance you have to play with. If the seam allowance is more than ¼ inch, you’ll be able to progress with the next steps.
Step 2
Work out your new seam by taking your measurements (or the measurements of the person the dress is intended for) at the fullest point of the bust. Measure the dress (both front and back) at the bust. Subtract the second measurement from the first to work out how much you need to let the dress out by.
Step 3
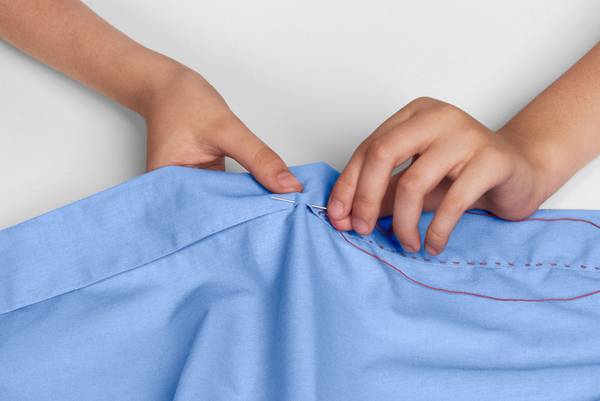
Using a seam ripper, very gently remove the stitching on the bust of both sides of the dress. Take extra care not to pull too hard, as this can cause the fabric to stretch or even tear.
Step 4
Divide the amount you need to let the bust out by 4. This will give you how much you need to let out on each side. So, for example, if you need to let the dress out by 4 inches, you’ll need to mark 1 inch from the stitching on each side, both front and back. Mark the new seam on the dress with tailor chalk and pin the edges of the dress back together at the chalk mark.
Step 5
Stitch the dress back together (you can do this either by hand or with a sewing machine), starting at the chalk mark of one end of the open seam and working your way along the length. Tie off the ends of the thread and remove the pins to finish.
How To Alter The Bust On A Wedding Dress

If the pre-wedding diet hasn’t gone quite too plan, don’t despair. A few minor alterations can quickly transform an overly tight nightmare into a comfortable dream.
Depending on the style of the wedding dress, you can either use the same method we used in the last set of steps or, as an easy alternative, simply add a fabric gusset to increase the overall width of the dress.
A How-to-Guide To Adding A Gusset
What You’ll Need
- Gusset Fabric (lace works well with most wedding dresses)
- Hemming Tape
- Hook and Loop Adhesive Strips (choose ones in the same color as the dress)
- Basic Sewing Supplies
The Method
Step 1
Unzip or unlace the dress to the point where the dress is a comfortable fit (although still keep it snug – don’t risk going from one extreme to the other). Loosen it enough for the dress to be removed. Lay the dress on a clean work surface.
Step 2
Grab a measuring tape and measure both the widest part of the opening at the top of the dress and the opening’s height. Add two inches to the first measurement and one inch to the second.
Step 3
Cut your gusset fabric according to the measurements taken in the previous step. Using hemming tape along the upper edge of the fabric, create a finished seam.
Step 4
Cut two strips of hook and loop adhesive tape using the same measurement as the second measurement you took in step 2.
Step 5
Place one piece of hook and loop adhesive strip (with the backing removed) along the outer edge of the gusset fabric. Repeat on the other side.
Step 6
Place the gusset fabric behind the opening of the dress and position so that it covers the opening completely.
Step 7
Place a pin at the top and bottom of the hook and loop strip to secure it to the dress. Unzip the dress, turn it inside out, and separate the adhesive strips. Unpin the hook and loop strip but leave the pins in the dress fabric.
Step 8
Remove the adhesive backing and attach the hook and loop strip to the inside of the dress, using the pins leftover from the previous step to guide you. Repeat the same process with the other hook and loop strip.
Step 9
Attach one side of the gusset, zip the dress up, and attach the other side.
How To Take In A Wedding Dress

We’ve seen how to fix a wedding dress that’s too small, but what if you’re facing the opposite problem? Fortunately, taking in a wedding dress at the bustline is just as easy as letting it out.
What You’ll Need
- Seam Ripper
- Straight Pins
- Tailor’s Chalk
- Rotary Wheel
- Transfer Paper
- Sewing Machine
- A Pair of Helping Hands
The Method
Step 1
Turn the dress inside out and try it on. Ask your helpful assistant to pin a new stitching line with straight pins, being careful to a) avoid puncturing you in the process and b) keep the front and back centers in line.
Step 2
Carefully remove the dress, taking care not to displace any of the pins. Mark the placement of the pins on both sides of the seam with chalk. Remove the pins and unstitch the seams with a seam ripper.
Step 3
Take a sheet of transfer paper and place the bodice on top, folded along the new stitching lines you’ve marked out. Using a rotary wheel, trace the seam lines onto the opposite side.
Step 4
Re-pin the bodice along the new seam lines and stitch in place to finish.
How To Make A Dress Smaller At The Bust

Constantly jerking up an ill-fitting dress can be a nightmare, but fortunately, it’s one that’s easily avoided. If you need to make your dress smaller at the bust, there are several different methods available for that exact purpose.
Method 1: Taking In
In this method, we’ll see how you can “take in” a dress by moving a seam inward (so basically, the exact opposite of what we’d do if we wanted to “let out” a garment).
What You’ll Need
- Measuring Tape
- Sewing Needle
- Thread
- Scissors
- Pins
What You’ll Do
Step 1
Calculate your new seam by measuring around your bustline. Be sure to measure at the fullest point of the bust. Measure the dress (both front and back) at the bust. Subtract the first measurement from the second. This will let you know how much you need to take the dress in by.
Step 2
Divide the measurement you took in step 1 by four. This will be the amount you need to take in the dress on each side (front left, back left, front right and back right). So, for example, if you’re reducing the bust by 2 inches in total, you’ll need to mark ½ inch from the stitching on each side. Mark the new seam line with chalk.
Step 3
Start sewing your new seam where the side seam crosses another seam. Use a straight stitch to sew all the way down. The excess fabric can either be trimmed or left in place (this is preferable in case you ever need to let the dress out in the future). Finish the raw edges with a zig-zag stitch.
Method 2: Darting
Darts can give a lovely shape to your dress, not to mention help overcome the problem of a gaping bustline.
If your dress already has darts, it’s easy to make a new dart in the same place as the existing one to create the perfect fit.
What You’ll Need
- Seam Ripper
- Matching Thread
- Scissors
What You’ll Do
Step 1
Unpick the original dart using a seam ripper. Carry on unpicking all the way up the seam to the underarm.
Step 2
Try the dress on to work out where the new dart is best placed to minimize any gaping around the bust.
Step 3
Fold the dart in place and mark its beginning and end with pins. Flip the dress inside out and sew the dart using an angled straight stitch as per your markings.
Step 4
Press the dart in place on the wrong side of the dart to finish.
How to Adjust The Bust on A Dress- Temporary Solutions

If your dress is borrowed or you simply haven’t the time to worry about darts and seam lines, a temporary solution like pinning or taping can be a great alternative to the permanent solution offered by tailoring.
Temporary Solution 1: Tape
Wondering how actresses always look so perfectly groomed on the red carpet? Believe it or not, the answer doesn’t just lie in the army of hair and beauty experts they have at their disposal. Fashion tape has long been one of Hollywood’s biggest secrets, effectively removing any potential for a dress to gape or slip. As it’s available in a wide variety of skin tones and sizes, it can be used discreetly and at almost any section of the bust, whether that’s at the sides of a strapless dress or at the curve of a neckline. You can even use it to keep spaghetti straps from slipping.
Temporary Solution 2: Pinning
First up, when we say “pins” in this context, we’re talking safety pins only. Unless you want to reach the end of the day looking like a pincushion, never wear a dress, or indeed anything else, that’s being held together by straight pins. To “pin” a dress in at the bustline, pop the dress on and ask a friend to gather any loose fabric at the side seams and pin with safety pins. Remove the dress and measure how much fabric has been pinned. Remove the pins, turn the dress inside out, then gather and measure the same amount of material as the amount you’ve just measured. Pin in place to finish.
Temporary Solution 3: Velcro
Used properly, Velcro can be a minor miracle worker (and one that’s almost as easy to remove as it is to add). If your dress is gaping at the bust, sew a piece of Velcro (use the soft, loopy side) under the arms of both sides of the dress. Sew the other half of the Velcro piece (i.e. the rough side) to the corresponding places on both sides of your bra. If the dress is also gaping at the back, repeat the process by attaching two small pieces of Velcro to the back of the dress and two small pieces on either side of the bra clasp.
As we’ve seen, a few small adjustments are often all that’s needed to transform your dress from an ill-fitting sack to a snug little number. Hopefully, you’ll have found plenty of tips and tricks to guide you- if you know anyone else that stands to do the same, please feel free to share the post.

