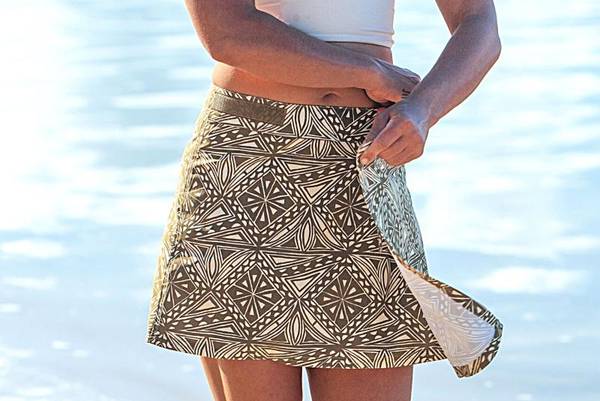
Rip Skirt Hawaii: How to Make a Rip Skirt (Pattern DIY)
Necessity is the mother of invention. It seems that the Rip Skirt Hawaii was invented by an over-scheduled mom who wanted something to cover her rear end as she left the beach to do errands, like pick up her kids from school. You can make one just as easily as she did.
How to make a rip skirt: Depending on your fashion sense, your modesty levels and other concerns, you can use a TNT pattern to help you make your own Rip Skirt Hawaii. This DIY option allows you to put in darts if you want that decorative touch added to your design.
To learn more about how to make your own Rip Skirt Hawaii just continue to read our article. It is filled with the information you need to DIY. Once you do it yourself you may be able to do it for others so they can be modest at the right times while remaining fashionable.
Making a Rip Skirt

You are going to find a few different methods to make your rip skirt Hawaii. One of those methods starts with making sure you have enough fabric to get the task done right. You can always trim off excess but you can’t add fabric when you do not have enough.
The fabric can be surf board shorts material as that fabric allows you enough room to freely move as you need to move. Plus the material provides enough modest coverage without being clingy.
There are two ways to fasten the skirt. One way is to use a hook and loop system which gives you adjustment capability when you want comfort or a looser fit. Or you can use Velcro closures at different parts of the top hem.
Those multiple locations will allow you to make adjustments as well as make sure you have a secure hold when you walk or bend over. The surfboard material is also quick drying so you do not have to sit uncomfortably while waiting for the fabric to dry.
Also, you can layer it and add an inside pocket to hold keys, etc., The layering gives you flexibility and adjusts your look as you see fit.
Finding a Rip Skirt Sewing Pattern

This should not be a problem to do as you have 3 lengths to choose from. There is a long design that reaches down to between your ankles and your knees. Then there is the mid-size that lands between your knees and hips.
Finally, there is a short size which exposes more than you be ready to expose. To measure the right length, the company itself starts at the true waist and goes from there.
The next step would be to measure your circumference and then measure how long you want it. The ease of making a Rip Skirt Hawaii style allows you to use a variety of sewing patterns. All you have to do is make decisions.
One of those decisions is to select which pattern you want to alter. Some sewers use TNT, others use the Burda designs and that company seems to have quite a few you can use.
If you are lucky, you might find a wrapper that was once made by Terry Cycling. It has been made with an elastic at the center back and you can follow already made wrappers to make some for a plus-sized figure.
The simplicity of construction opens your options to a wide selection of patterns you can use. The next decision you need to make is what kind of design you want to be seen in. Again you have a large selection and you may want to lean towards waterproof or water-resistant fabrics.
Next up you need to decide on the length of the dress and what kind of closure you want to use. With the closures, you again have a large selection and you should choose one that fits your lifestyle and preferences.
A Rip Skirt That Has No Pattern

It is possible to make your rip skirt without using a pattern. The amount of fabric needed will depend on two things- your size and how long or short you want the skirt to be.
Next, you will want about 3 times the size of your hip circumference no matter how heavy or light the fabric is. It is possible to go 5 times if you want. If you want to go below the knee then a fabric width of 45 inches is required.
Now you can use drawstrings if you want and to get the channel right you will need your hip circumference plus 1 yard. 1/4 inch thick drawstring, ribbon, and so on will suffice as a closure. If you want a 3 channel skirt and you have a 36-inch waist then you will need about 6 yards of material.
- Step 1. Cut the fabric to width size adding 1 inch for seam allowance. The cut should be cross-grain.
- Step 2. Cut the length to size but add 5 inches for hem and waist channels.
- Step 3. finish the side seam open edges by zigzagging or serging.
- Step 4. sew the side seams with right sides together.
- Step 5. Sew the casings or channels giving yourself about 3/4 of an inch per channel.
- Step 6. prepare the underlap with a 9-inch length then folded in half and a 1/4” seam allowance and attach it to the wrong side of the fabric at the back
- Step 7. Insert the ribbon or drawstring through the channels.
And you are done.
Some Final Words
Rip skirts are not that hard to make and you have the luxury to be able to alter just about any pattern you want to. These skirts are great fashion accessories when you need modesty and comfort when doing errands on a hot day.
Just go with the right fabric so you remain comfortable all day long.

