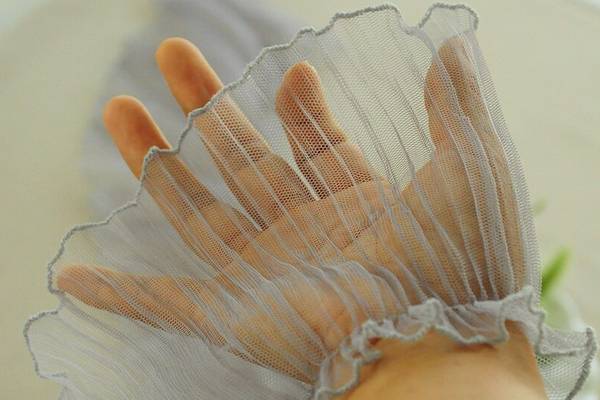
Easy Organ Pleats Tutorial: How to Make Organ Pleats
Support is always important. No matter what you do you need good support if you are going to succeed in life. The same goes for sewing if you want your organ pleats to be successful then you have to focus on the type of support those pleats need.
An old fashioned way to make pleats is to cut the back a few inches wider than a flat plain back would be. Then what is called the superfluity needs to gather 5 to 6 inches so that this section of the pleat stands out from the figure. You also need plenty of slope at the front and sides.
Those few instructions came from the 19th century and you can read more details here. To learn more modern ways of making organ pleats just continue to read our article. It has the information you need.
How to do Organ Pleats

Using that 19th-century technique is not that unreasonable. Some sewers go back to the 16th century and Germany to find their examples to do organ pleats just right.
For them to do organ pleats just right, they had to add a chemise, a kirtle, a gown, and a collar. You are going to need about 3 yards of fabric to get the skirt to pull down to about 32 inches. You may need a crinoline cage to support the fabric you intend to use.
The marks you have to make are alternating between 1 and 2 1/4 inches along the top with an approx. 1 to 2-inch stitch fold. This technique is going to have to be repeated often till you get the organ pleats around the skirt portion of the gown.
Don’t be surprised if the uninitiated look at your work and identify them as curtains. The technique for organ pleats for gowns is about the same as it is for curtains.
How to Sew Organ Pleats

Just so there is no confusion especially since there are at least 15 different types of pleats you can make. Organ pleats are rounded and look like the pipes the old-time organs used to have attached to the keyboard, stops and pedals cabinet.
The first step is to make sure you have enough fabric to create the pleats. The time to do this is before you start to mark and measure which is the second step.
Next, lay the fabric nice and flat and make your cuts. After that, you need to mark out where your pleats are going to go. The key here is not to add or leave out any pleats your pattern calls for. If you do you will most likely ruin the look of the dress or skirt.
Once all the pleats are marked, fold the fabric at the first middle line and pin it. Continue to do this till all the pleats are pinned in place. Now go to your sewing machine and straight stitch about 1/2 inch from the top
That is about it. Just make sure the pleats are rounded like an organ pipe and the dress or skirt should be good to go. When you do organ pleats check to make sure you have enough gores on the outer garment. Those help shape the pleats just right.
Organ Pipe Pleats

One of the problems with making organ pleats is that there may not be a lot of tutorials out there to guide you step by step. In our research, we found more articles for regular, accordion and similar pleats and rarely did one address the organ fashion style.
There are a lot of images on the internet that you can follow and there may be some instructions from earlier centuries. There are some pleated fabrics you may use to help you get a head start in creating organ pleats but as some people have said, that may be cheating.
The key to creating good organ pleats will be in the support system you use. The pleats are only going to be as good as the support they are given
Organ Pleats Dress

One of the keys to being successful at creating an organ pleat dress is to have the dress rest on the hips. The crinoline cage support may create a back and forth sway to the outfit whereas having the gown rest on the hips creates a graceful glide like look.
That is probably more elegant of a look than the crinoline cage style. Then you can change the way the dress looks and add a little more visual drama by adding different fabrics and colors.
The late famous designer Charles James did this back in 1953 with his equally famous clover leaf pleat dress. He also drew inspiration from the 19th century and created what was then a modern fashion marvel. His dress was made for the Eisenhower inaugural ball but was worn to Queen Elizabeth II coronation instead.
Different Types of Pleats
We mentioned earlier that the organ pleat was just one of many different types of pleats you can use to create a great look. Here are the names of the other styles you can use:
- Accordion - equal and smaller pleats
- Knife - used for cheerleader outfits
- Sunray - start at the waist
- Box - more elegant than knife
Then there are the kick, the fluted, the pinch, plisse, honeycomb, fortuny, rolled, inverted, kingussie, watteau and the cartridge. Each style has their purpose and look.
Some Final Words
Organ pleats will make any female look elegant, sophisticated as well as very attractive, it is no wonder many people like to include them on their formal gowns. They are just hard to make and even harder to find tutorials to make them.
The key to having organ pleats will always be in the support you give them and Mr. James may be right, putting the weight on the hips adds a certain classy touch to the gown.

